
How to Polish Car Headlights: 3 Methods
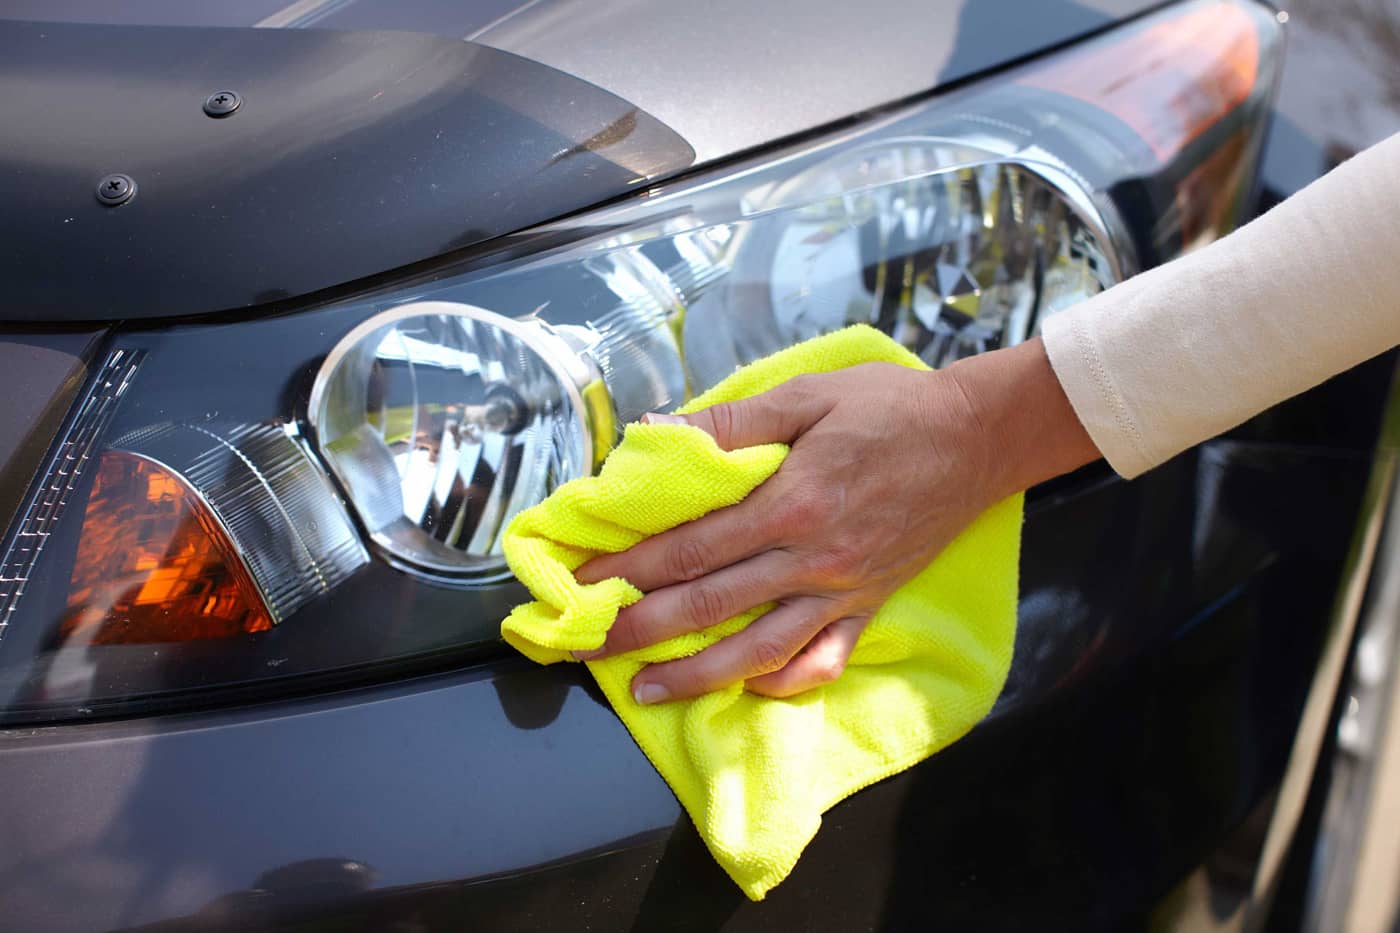
Table of Contents
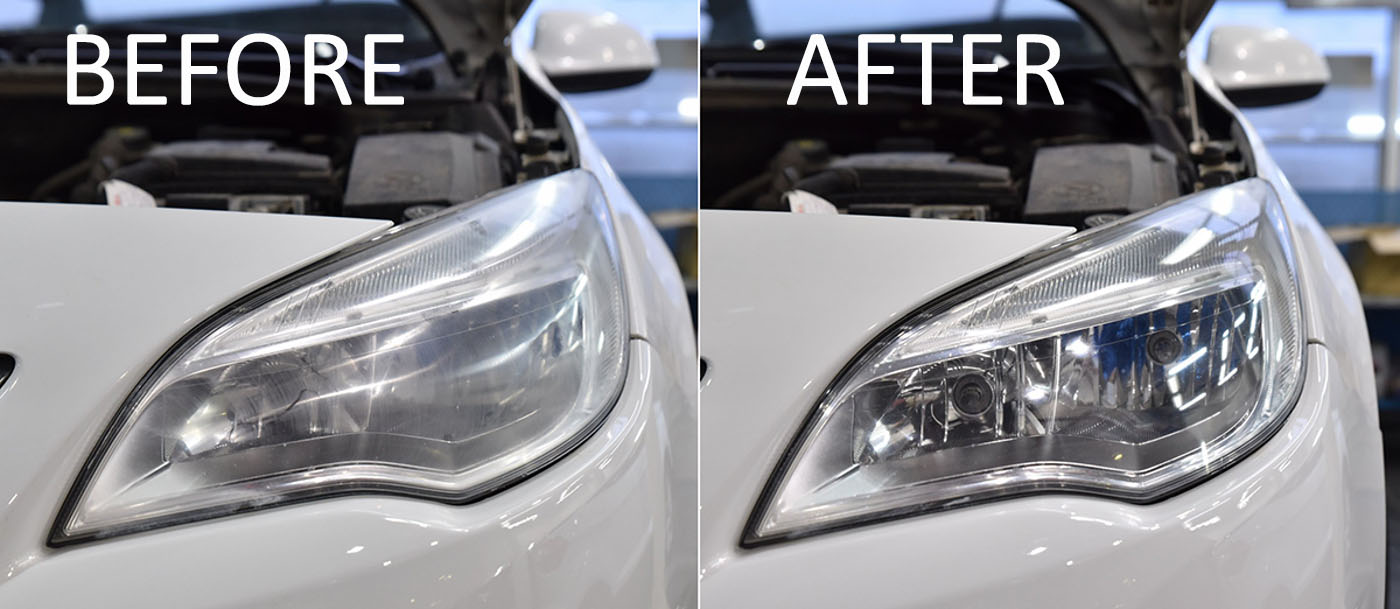
Over time, car headlights tend to become cloudy and dull. In some cases, they may even turn yellow. Polishing can help restore their original clarity and appearance.
To do this, you can use either specialized automotive care products or proven DIY methods. However, keep in mind that headlight polishing requires attention to detail and a certain level of skill — mistakes can be costly. In this guide, we’ll explain when headlights need polishing, how to do it correctly, and which common mistakes to avoid.
Why Should You Polish Headlights?
Headlight polishing is the process of restoring the clarity of automotive lenses to bring back their original look and full functionality. The main goal is to remove the top layer of plastic from the outer surface of the headlight to eliminate cloudiness and restore shine. Clouded headlights emit less light, which can significantly reduce road safety.
Most modern vehicle headlights are made from polycarbonate or acrylic. These materials are highly durable and resistant to mechanical damage such as dust, dirt, and small stone impacts. However, they are vulnerable to UV rays. To protect the headlights, manufacturers apply a UV-resistant coating during production. Over time, this protective layer deteriorates, causing the plastic to lose transparency and become hazy.
What Can Be Used to Polish Car Headlights
Let’s look at the most popular options:
- Polishing pastes
These products contain abrasive particles and vary in their level of effectiveness. At home, people often use toothpaste, sometimes mixed with baking soda for stronger results. - Mechanical polishing
This method involves using specialized tools like a polishing machine or a drill with polishing attachments. It offers more consistent and uniform results. - Chemical polishing
Also referred to as non-contact polishing (although that term isn’t entirely accurate), this method involves using special chemical solutions, such as dichloroethane or acetone-based compounds.
Manual headlight polishing is time-consuming, but its main advantage is the minimal risk of damaging the lenses. In contrast, mechanical and chemical polishing methods allow for faster and more even results, but they require a certain level of skill to perform safely and effectively.
Manual Headlight Polishing with Toothpaste
This is the simplest and most accessible method of headlight polishing, with minimal risk of damaging the lens. It’s easy to do yourself. You’ll need the following tools:
- toothpaste
- degreaser (preferably alcohol-based)
- masking tape to protect the surrounding paintwork
- a soft cotton cloth, lint-free rag, or a dedicated polishing sponge

Start by cleaning the headlight thoroughly. Apply a layer of toothpaste, spreading it evenly over the surface. Let it sit for a few minutes to begin drying slightly. Then, using the cloth or sponge, rub the paste into the plastic with light circular motions and moderate pressure. To prevent the paste from drying out too quickly, periodically add a few drops of water. Polish the surface for 5–10 minutes, then rinse thoroughly with clean water.
This method works well when the headlight lenses are only slightly oxidized or cloudy. However, it’s not effective for more serious damage or deep defects.
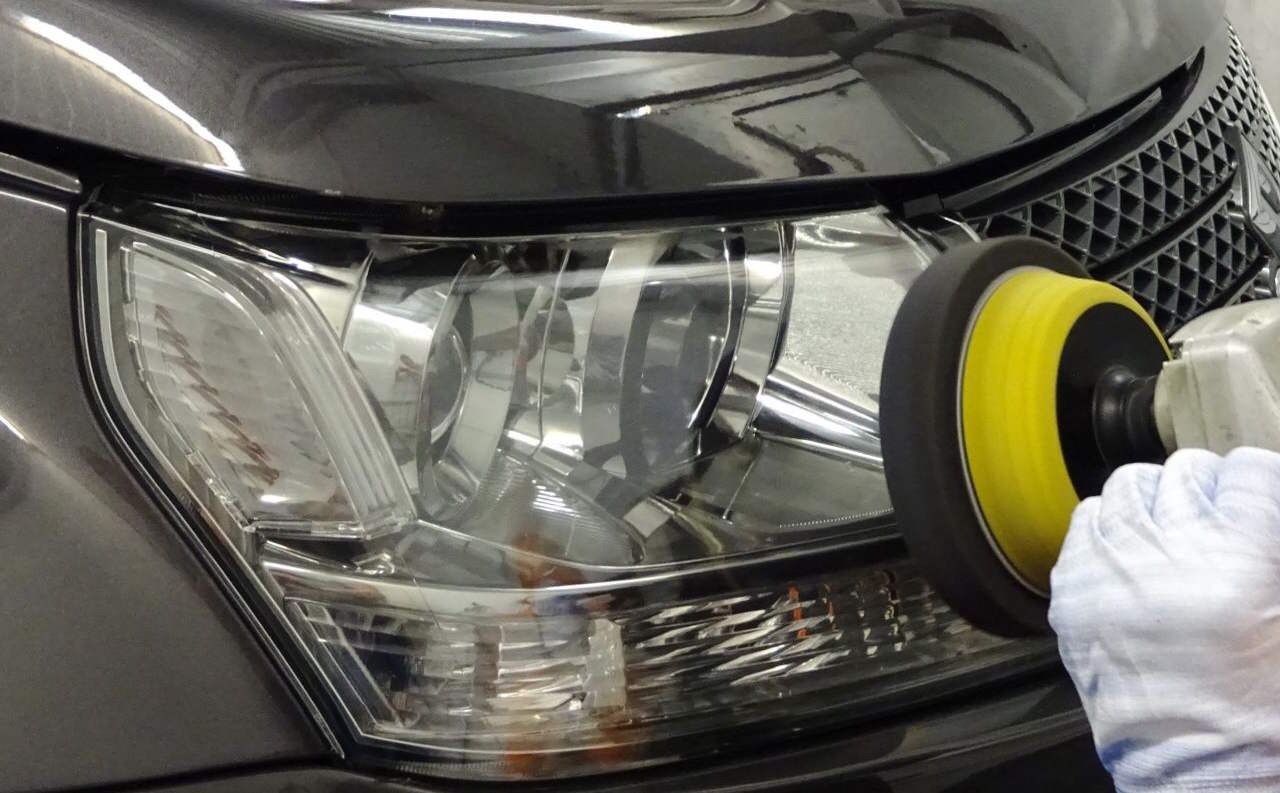
Mechanical Headlight Polishing
This method requires some experience, so if you’re unsure of your skills, it’s best to leave the job to professionals. However, if you choose to polish your headlights yourself, you’ll need the following items:
- a polishing machine or a drill with adjustable speed control
- abrasive pads with various grit levels: 800, 1000, 1200, 1500, 2000, 2500
- waterproof sandpaper in the same grit range (if you plan to sand manually)
- masking tape to protect the paintwork
- a degreaser (alcohol-based is recommended)
- headlight polishing compound
- wool and foam polishing pads
- clean rags or a microfiber towel
Polishing Steps:
1. Preparation
Before you begin, prepare the vehicle: clean the headlights, degrease them, and carefully mask off the surrounding area using painter’s tape. Add a few extra layers of tape to cover adjacent body panels and the front grille. This will help protect the paintwork from accidental damage during sanding.
2. Headlight Sanding
The purpose of sanding is to remove the damaged plastic layer, including any remaining UV coating. The process begins with a low-grit abrasive pad to eliminate deep scratches. If such defects are present, start with sandpaper rated P800. For minor imperfections, you can begin with finer grits such as P1000 or P1200.
It’s recommended to keep the machine's speed below 2000 RPM. To prevent overheating, frequently wet the surface with water. Move the tool in consistent strokes, such as vertical (up and down), applying moderate pressure. Avoid holding the pad in one spot for too long to prevent heat buildup and potential plastic damage.
After the initial sanding, switch to a higher grit disc (e.g., P1000) to smooth out marks left by the coarser abrasive. It’s also a good idea to change the sanding direction—e.g., switch to horizontal strokes.
Repeat the sanding process, increasing the grit step by step until the headlight surface is smooth.
As a result of proper sanding, the surface will become smooth but slightly matte in appearance.
If you don’t have a polishing machine, you can perform the process manually using waterproof sandpaper. The sequence and method remain the same as with the machine.
If you skip grits or don’t sand thoroughly with each level, visible scratches and haze may remain after polishing, creating a “hologram” effect or leaving the lens looking dull.
3. Polishing
At this stage, a polishing compound is applied. The paste should be worked into the surface using circular motions, either with a dry microfiber cloth or a polishing machine fitted with the appropriate pad.
For best results, start with a wool pad to remove any remaining fine scratches. Then switch to a foam pad to smooth the surface and restore clarity and shine.
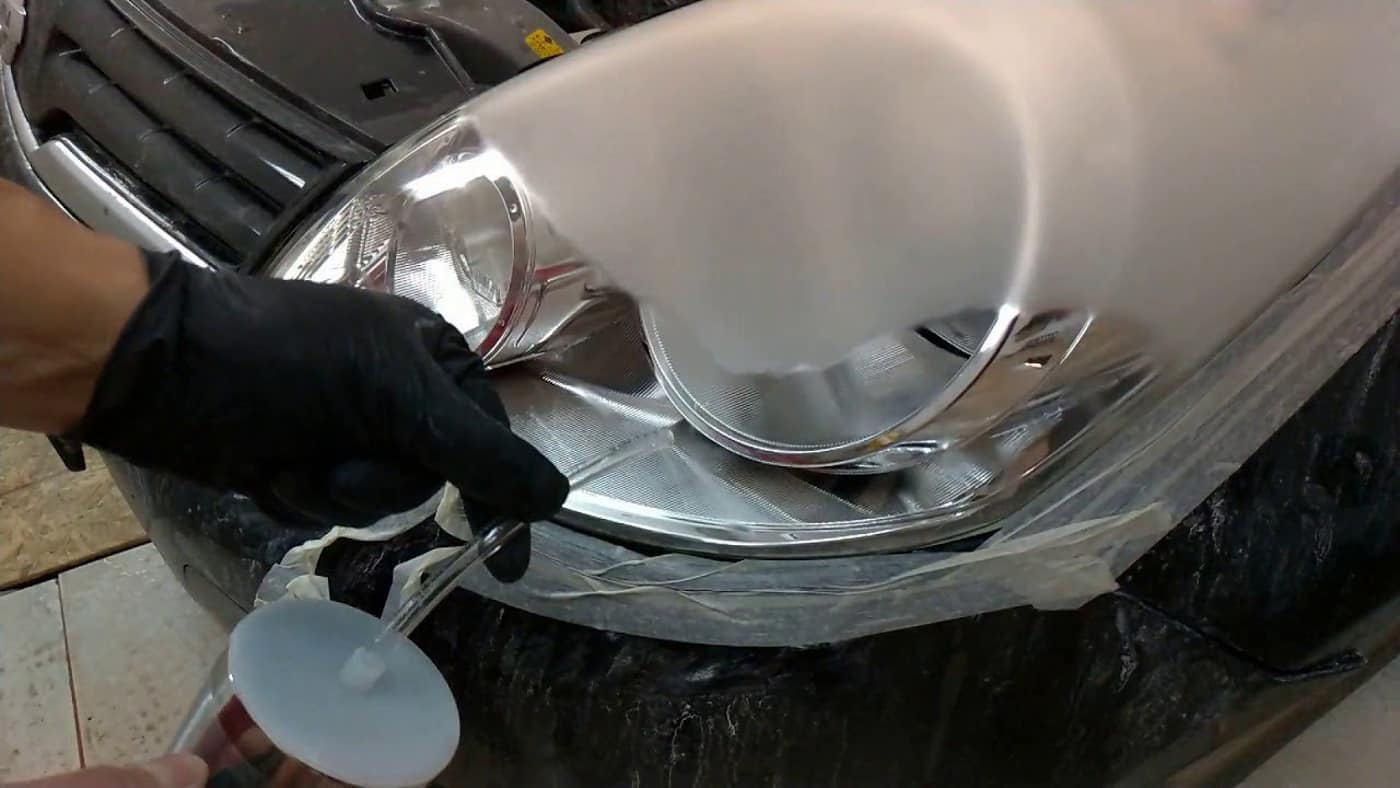
Chemical Headlight Polishing
This method is considered one of the most effective, but it requires extreme caution — without proper experience, there’s a high risk of damaging the plastic. Chemical polishing is performed using specialized headlight restoration kits, which typically include:
- a stainless-steel heating cup with a narrow spout, similar to a small kettle. It may be powered by a wall socket, car cigarette lighter, or battery pack
- waterproof sandpaper in various grit sizes
- a container of chemical solution used for the polishing process
Procedure:
Chemical polishing should be performed in a well-ventilated area with all safety precautions in place. Safety goggles and a respirator are a must. As with other methods, begin by washing and drying the headlights and masking off nearby surfaces with painter’s tape — or remove the headlights from the vehicle entirely.
Next, sand the headlights and make sure the protective UV layer is fully removed. (The sanding process is detailed earlier.) Pour the chemical solution into the heating device and turn it on. Once the liquid heats up, vapor will begin to flow from the spout. Use this vapor to treat the headlight surface from a distance of about one centimeter, making smooth upward motions.
Once the treatment is complete, allow the headlight to dry fully.
Chemical polishing requires careful execution and attention to every step, but it delivers excellent results, restoring the clarity and appearance of the headlight lenses.
Protective Coating After Polishing
As mentioned earlier, manufacturers apply a UV-protective coating to the surface of the headlights during production to shield them from sunlight and prevent yellowing. After polishing, this coating is removed, so applying a new protective layer is essential to prolong the life of the headlights. Without it, they can become cloudy again within a few months.
The most commonly used protection methods include:
- Headlight clear coat
This special transparent lacquer forms a thin physical barrier that protects against UV rays, dirt, and light mechanical damage. It can be applied at home or by a professional, though for longer-lasting results, professional application is recommended. The durability of the coating depends on the product quality and proper application. On average, it lasts 1 to 2 years. - Ceramic coating
Ceramic products create an extremely durable layer that offers protection against UV rays, chemicals, dirt, and water. They also provide a hydrophobic effect, meaning water and grime slide off more easily, making the headlights easier to clean. This is ideal for those seeking long-term protection with minimal maintenance. The coating typically lasts 2 to 3 years, depending on the product quality, environmental conditions, and care routine. - Polyurethane protective film
This transparent film shields the headlights from scratches, road debris, and UV exposure. Thanks to its flexibility, it can withstand mechanical impacts such as small stone hits, making it especially useful for vehicles frequently driven on rough roads. Polyurethane films can last more than 5 years. Installation should be done professionally to ensure the film is perfectly stretched and applied without air bubbles or creases. It requires minimal maintenance and can be removed later without damaging the surface.
Summary: Clear coat is a quick and budget-friendly solution, ceramic coating offers long-term protection, while polyurethane film delivers the highest level of durability. For optimal results, it’s recommended to combine multiple methods—for example, apply a ceramic protective layer and reinforce it with a polyurethane film for added protection.
How to Extend the Lifespan of Headlights
Although headlight plastic inevitably ages over time, following a few simple tips can slow the process down. Here’s what to keep in mind:
- Regular washing
Wash your vehicle frequently using a quality car shampoo. This helps remove accumulated dirt, chemicals, and other contaminants that can gradually cause cloudiness or damage to the headlights. - Park in the shade
Whenever possible, park your car in shaded areas to reduce exposure to direct sunlight. This limits UV damage and slows the oxidation of the plastic. - Proper care
Clean your headlights using a soft cloth or brush moistened with water. This gentle approach helps prevent scratches and extends the lifespan of the headlight surface.
Conclusion
Polishing headlights at home might seem like a simple task, but in reality, it requires precision and some skill. Without proper care, you risk damaging the lenses. If you’re unsure of your ability to perform the process correctly, it’s best to leave it to professionals. In a specialized service center, trained technicians can restore the clarity of your headlights using professional equipment and techniques.
And if polishing seems like more trouble than it’s worth, you can always replace your old headlights with new ones. Browse our online store to find a wide selection of high-quality headlight replacements.
Select the right headlights for your vehicle in the catalogue.
Go to the headlights catalogueFrequently Asked Questions
Why should car headlights be polished?
Polishing restores plastic transparency, removes haze and scratches, improves light output, and increases safety when driving at night.
When do headlights require polishing?
When yellowing, dullness, reduced brightness, scattered beam patterns, glare, or decreased visibility in rain or dusk appear.
Can headlights be polished independently?
Yes — if you have a polishing kit. It is important to work step by step, use fine abrasives, and avoid overheating the plastic.
Is polishing plastic headlights safe?
When performed correctly — yes. Problems occur only if overly aggressive abrasives or excessive pressure are used.
How long does the effect of polishing last?
Typically 6–12 months. This period can be extended by applying a protective coating and maintaining the headlights regularly.